hugo初体验
安装hugo
下载链接
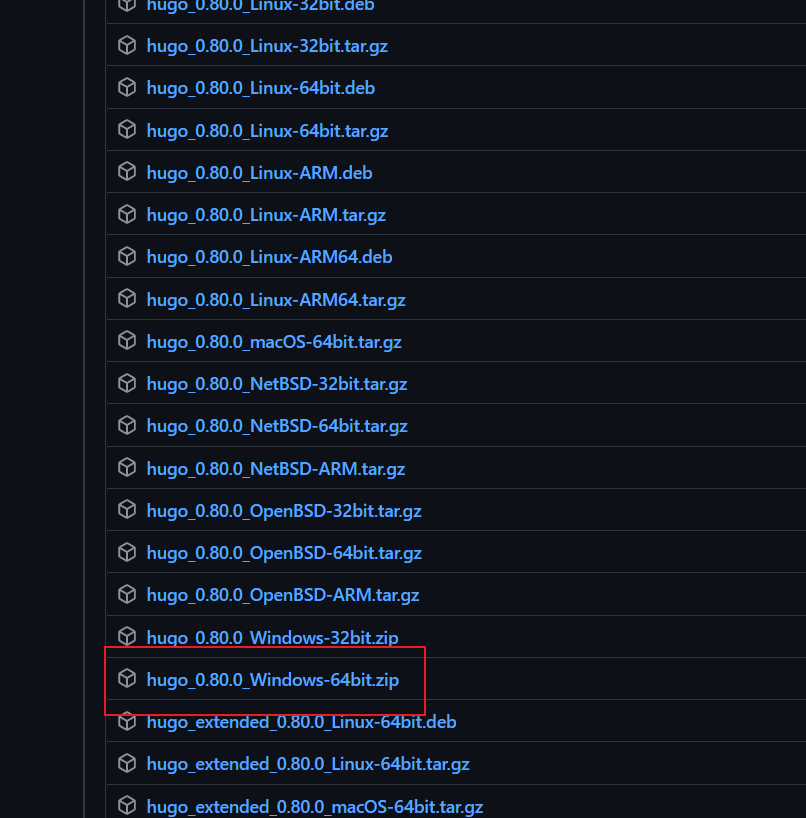
我这里选择的最新版本v0.80.0,选择操作系统对应的版本即可。

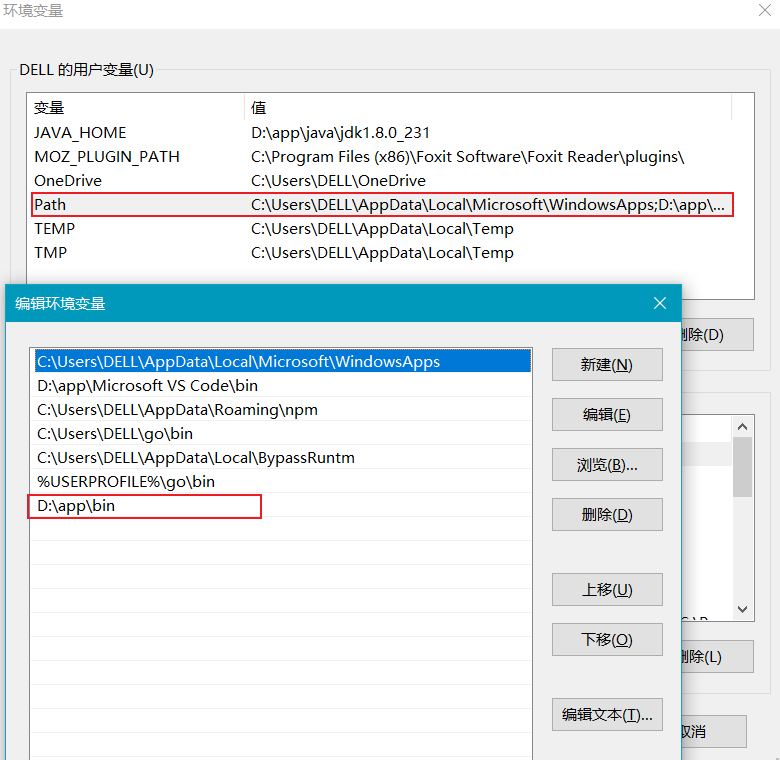
下载后将hugo.exe加入到环境变量中,我是习惯创建一个bin目录,将可执行文件都放到这里。

ps 下载的时候发现链接竟然打不开了,可以通过添加hosts解决
 1
 2
 3
 4
 5
 6
 7
 8
 9
10
11
| # github
199.232.96.133 avatars0.githubusercontent.com
199.232.96.133 avatars1.githubusercontent.com
199.232.96.133 avatars2.githubusercontent.com
199.232.96.133 avatars3.githubusercontent.com
199.232.96.133 avatars4.githubusercontent.com
199.232.96.133 avatars5.githubusercontent.com
199.232.96.133 avatars6.githubusercontent.com
199.232.96.133 avatars7.githubusercontent.com
199.232.96.133 avatars8.githubusercontent.com
199.232.96.133 user-images.githubusercontent.com
|
创建一个hugo项目
1
| $ hugo.exe new site jinnzy.github.io.source
|
安装主题
这里有两种方法我采用的第一种方法,比较方便,有什么问题可以直接修改。
第一种:下载最新的压缩包或直接clone到themes目录
1
2
3
| $ cd jinnzy.github.io.source
$ git clone https://github.com/dillonzq/LoveIt.git themes/LoveIt
|
第二种:使用子模块来安装
1
2
3
| $ cd jinnzy.github.io.source
$ git init
$ git submodule add https://github.com/dillonzq/LoveIt.git themes/LoveIt
|
修改配置
位置:./config.toml
可以参考官方文档中3.1的示例配置,由于太大这里就不贴出来了
在这个基础上我额外修改了以下几个配置,其余的就是一些网站标题描述等的就不多说了。
 1
 2
 3
 4
 5
 6
 7
 8
 9
10
11
12
| # 是否使用 git 信息
enableGitInfo = true
[params]
gitRepo = "jinnzy.github.io.source"
[markup]
# 目录设置
[markup.tableOfContents]
# 从1个#开始算标题,默认是两个#开始算标题
startLevel = 1
endLevel = 6
|
修改文章默认的模板
位置:./archetypes/default.md
 1
 2
 3
 4
 5
 6
 7
 8
 9
10
| ---
title: "{{ replace .Name "-" " " | title }}"
date: {{ .Date }}
draft: false
toc: true
tags:
- ""
categories:
- ""
---
|
加入了目录标签和分类等。
创建第一篇文章
1
| $ hugo new posts/hugo-blog-1.md
|
启动进行测试,会报错
1
2
3
| $ hugo server -D
···
Error: Error building site: failed to render pages: render of "page" failed: execute of template failed: template: posts/single.html:92:124: executing "content" at <partial "function/content.html">: error calling partial: "/Users/tc/Documents/workspace_2020/blog/themes/loveIt/layouts/partials/function/content.html:15:15": execute of template failed: template: partials/function/content.html:15:15: executing "partials/function/content.html" at <partial "function/checkbox.html" $content>: error calling partial: partial that returns a value needs a non-zero argument.
|
-D不加也可以,因为前面已经设置 draft: false 了。
这里报错是一个bug,已经有人pr但是并未合并进来,所以要自己手动修改一下。
修改文件:themes/loveIt/layouts/partials/function/content.html
修改后如下
 1
 2
 3
 4
 5
 6
 7
 8
 9
10
11
12
13
14
15
16
17
18
19
20
21
22
23
| {{- $content := .Content -}}
{{- if ne "" $content -}}
{{- if .Ruby -}}
{{- $content = partial "function/ruby.html" $content -}}
{{- end -}}
{{- if .Fraction -}}
{{- $content = partial "function/fraction.html" $content -}}
{{- end -}}
{{- if .Fontawesome -}}
{{- $content = partial "function/fontawesome.html" $content -}}
{{- end -}}
{{- $content = partial "function/checkbox.html" $content -}}
{{- $content = partial "function/escape.html" $content -}}
{{- end -}}
{{- return $content -}}
|
随后再次启动,进入[http://localhost:1313](http://localhost:1313/) 就可以看到博客首页了。
利用github pages部署blog
前置条件:需要安装git
创建github仓库
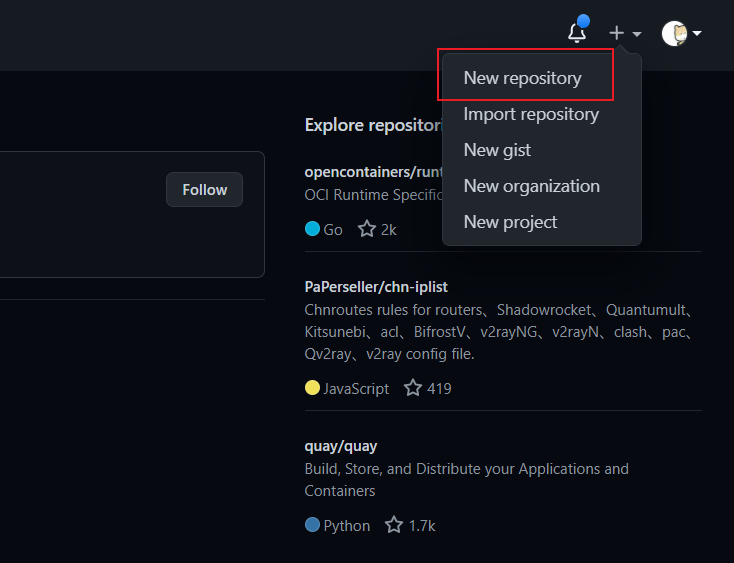
登录github创建库


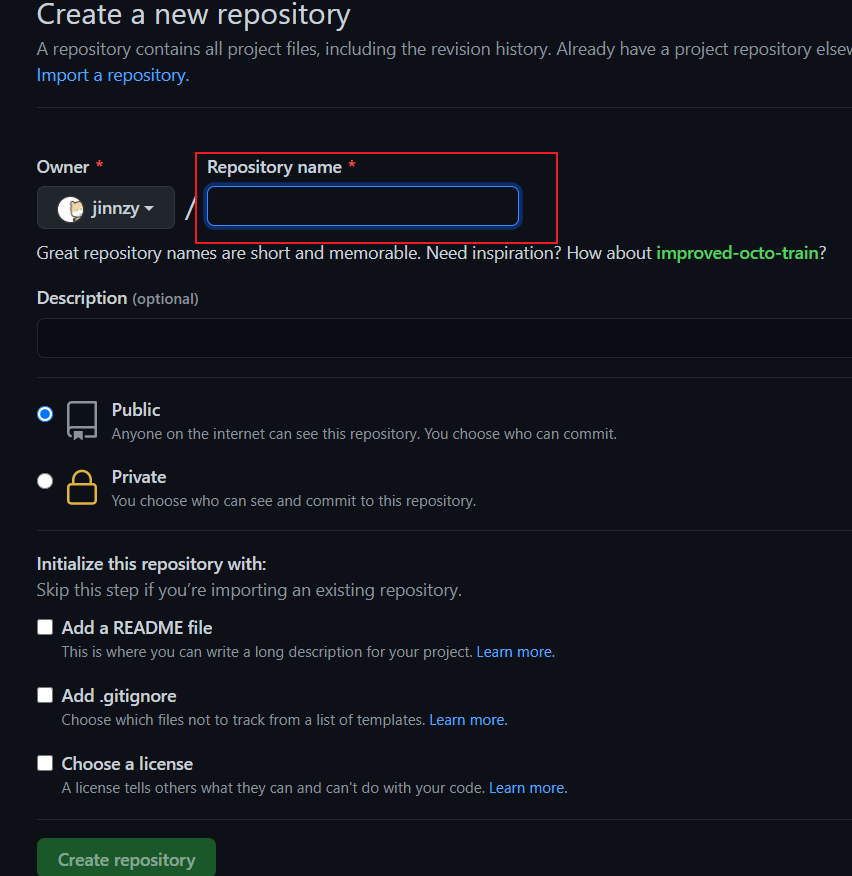
我这里是创建了两个库
jinnzy.github.io.source 选择的是私有库(Private)存放hugo源文件,利用github actions来编译生成静态文件推送到jinnzy.github.io库中jinnzy.github.io 选择的是公共库(Public)存放hugo编译后的静态页面,主要是通过github pages功能访问这些静态文件。
配置github ssh key
生成ssk key
 1
 2
 3
 4
 5
 6
 7
 8
 9
10
11
12
13
14
15
16
17
18
19
20
21
| $ ssh-keygen
Generating public/private rsa key pair.
Enter file in which to save the key (/root/.ssh/id_rsa):
Enter passphrase (empty for no passphrase):
Enter same passphrase again:
Your identification has been saved in /root/.ssh/id_rsa.
Your public key has been saved in /root/.ssh/id_rsa.pub.
The key fingerprint is:
53:0e:0b:0f:c0:b8:d3:4f:e1:8a:a8:5d:8c:8f:98:cf jinzhy@vlnx107005.firstshare.cn
The key's randomart image is:
+--[ RSA 2048]----+
| o. |
| . ... |
| o .o.. . |
| o . o+ = |
| . = + S . |
|. o + . . |
|.+ + |
|+.o . |
| .E |
+-----------------+
|
/root/.ssh/id_rsa 私钥/root/.ssh/id_rsa.pub 公钥
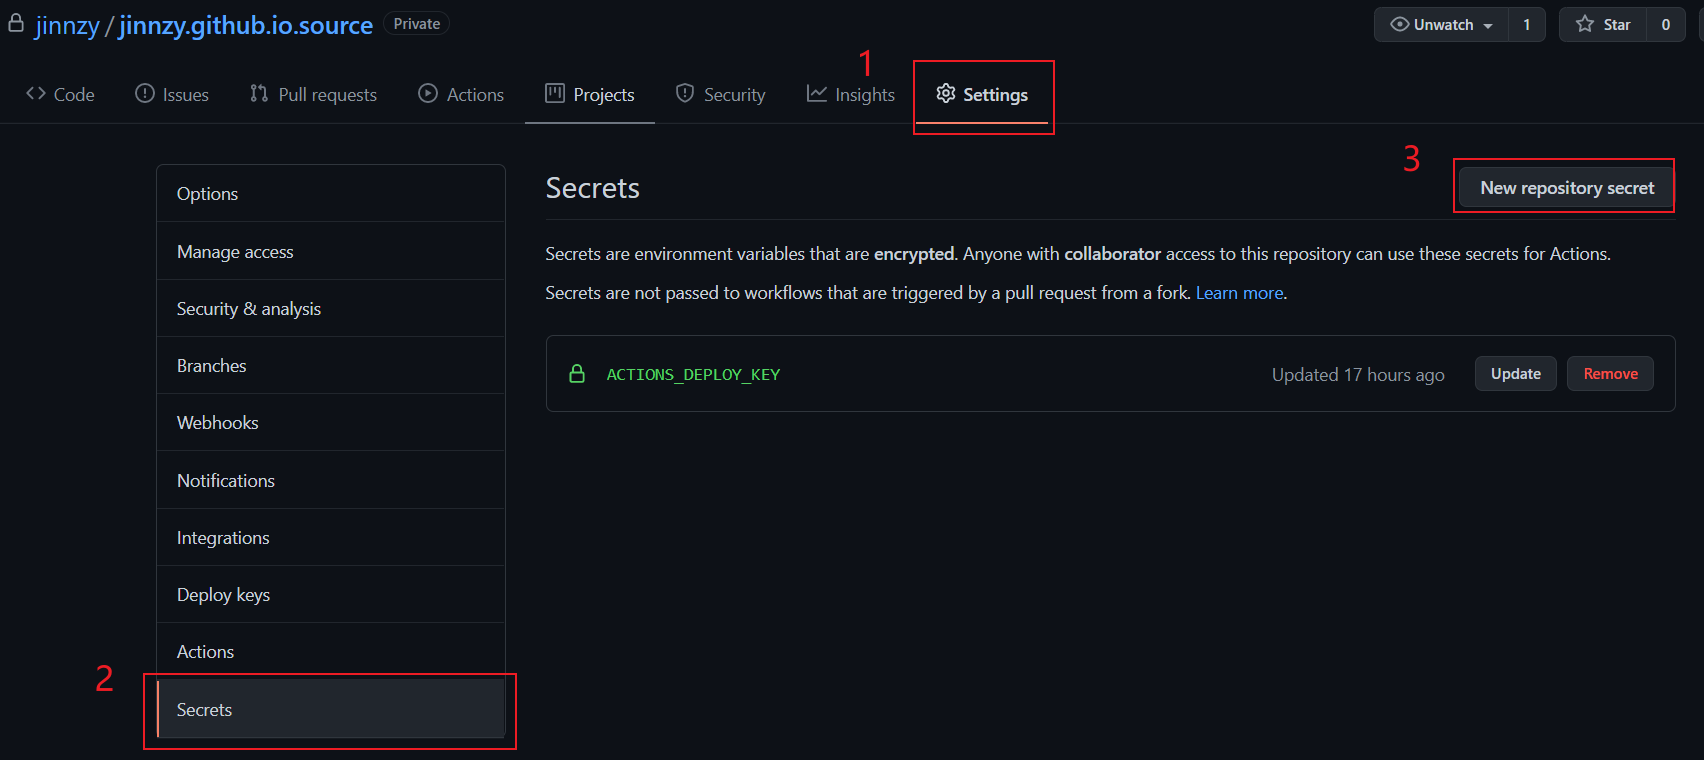
打开jinnzy.github.io.source 库添加Secrets ,名称为ACTIONS_DEPLOY_KEY,将/root/.ssh/id_rsa的内容复制进去

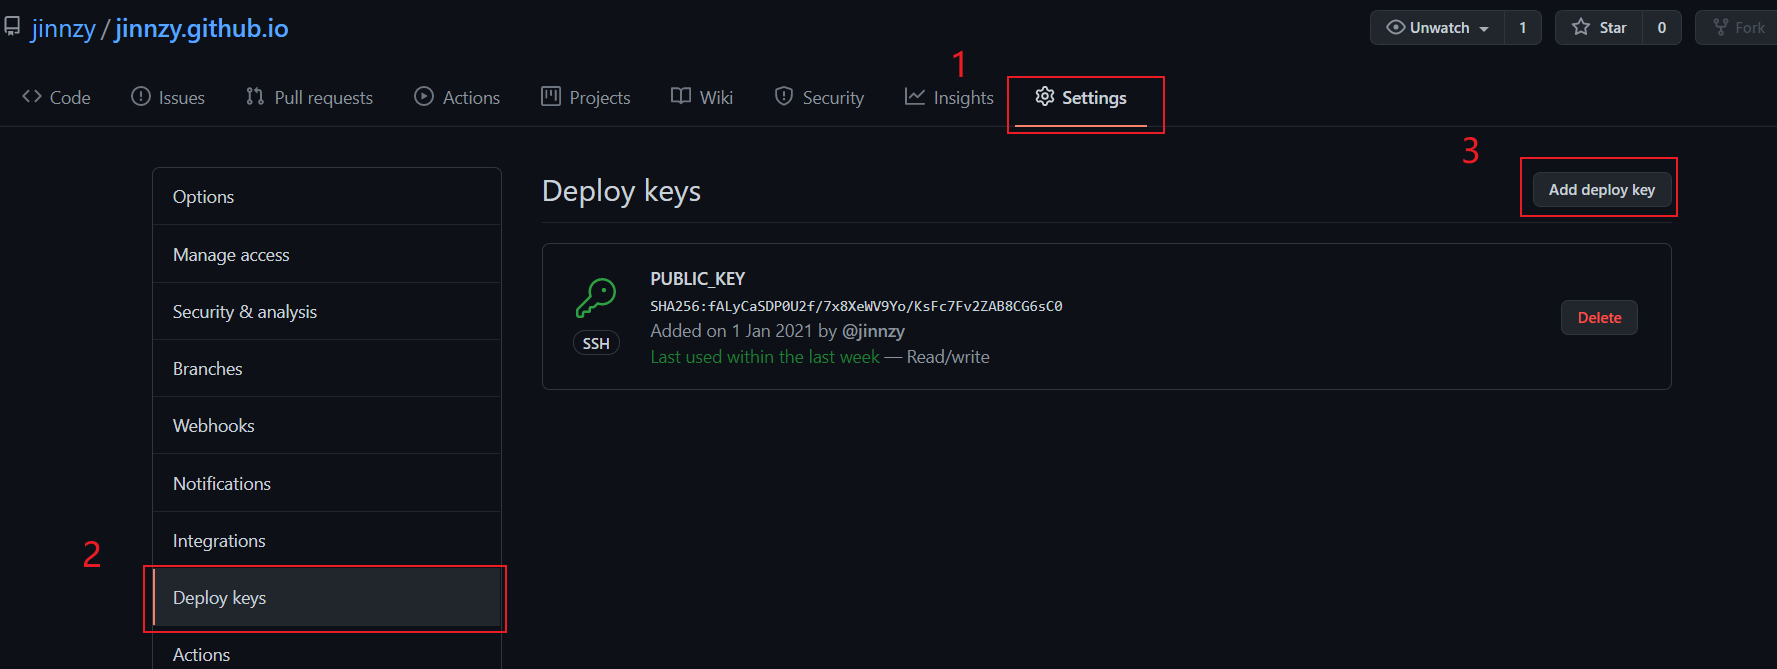
打开jinnzy.github.io 库添加Deploy keys ,名称随便都行,将/root/.ssh/id_rsa.pub的内容复制进去。

配置github actions
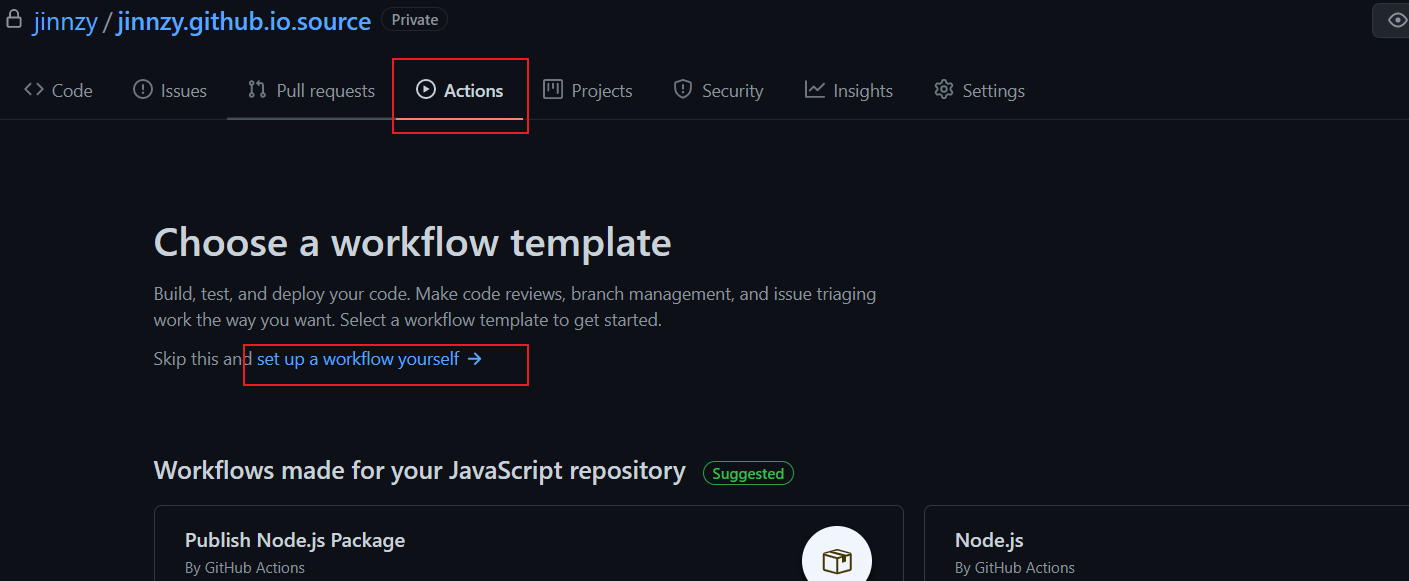
打开jinnzy.github.io.source,创建Actions


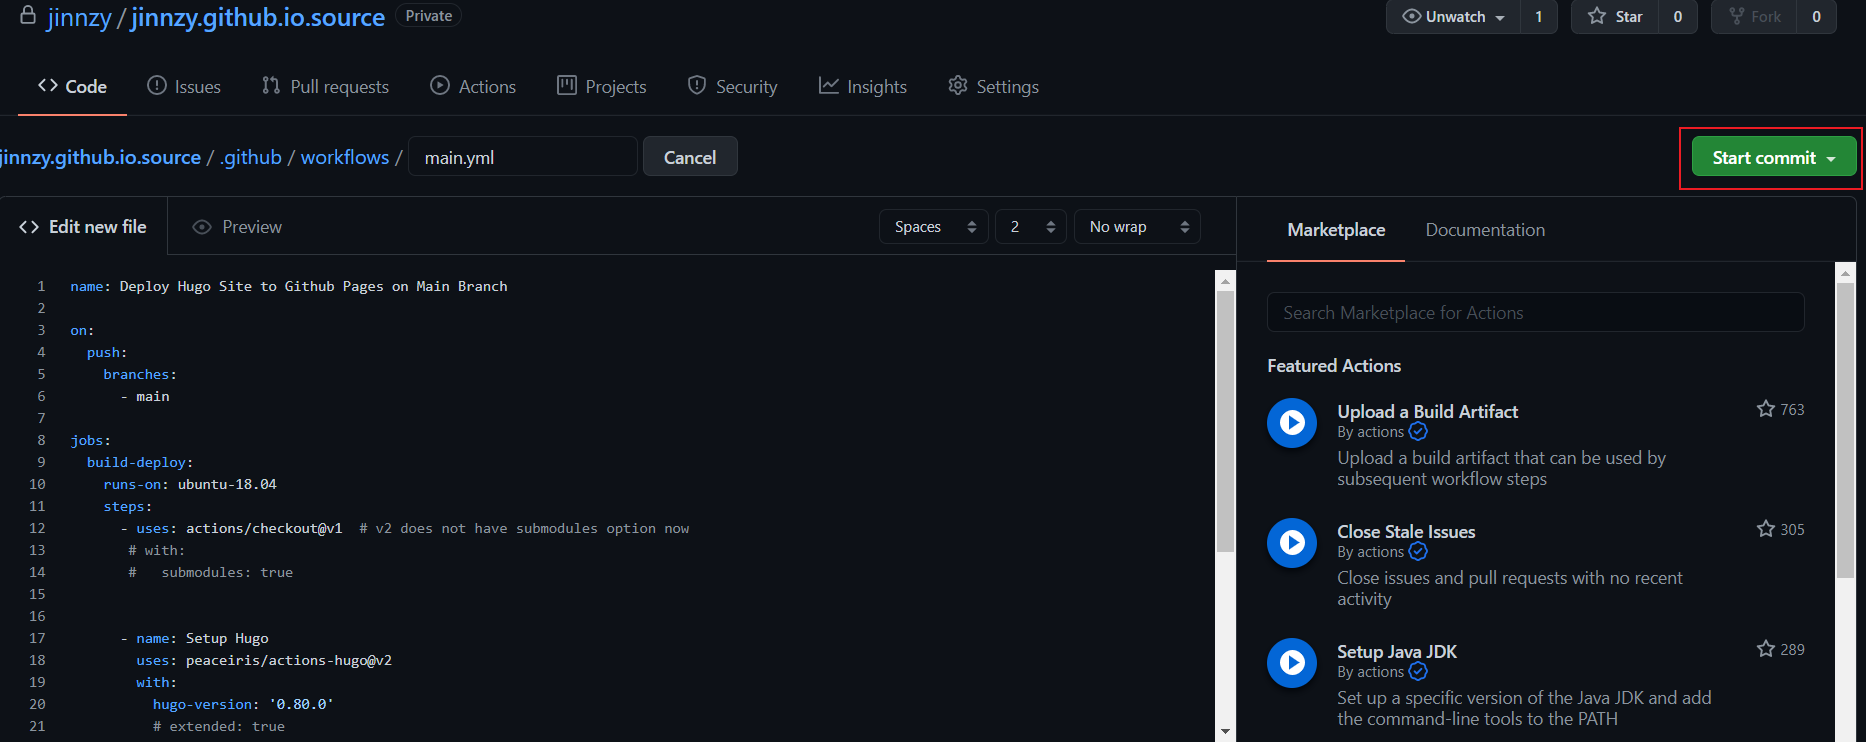
全部内容如下:
 1
 2
 3
 4
 5
 6
 7
 8
 9
10
11
12
13
14
15
16
17
18
19
20
21
22
23
24
25
26
27
28
29
30
31
| name: Deploy Hugo Site to Github Pages on Main Branch
on:
push:
branches:
- main
jobs:
build-deploy:
runs-on: ubuntu-18.04
steps:
- uses: actions/checkout@v2
- name: Setup Hugo
uses: peaceiris/actions-hugo@v2
with:
hugo-version: '0.80.0'
extended: true # 使用扩展版
- name: Build
run: hugo --minify
- name: Deploy
uses: peaceiris/actions-gh-pages@v3
with:
deploy_key: ${{ secrets.ACTIONS_DEPLOY_KEY }} # 这里的 ACTIONS_DEPLOY_KEY 则是上面设置 Private Key的变量名
external_repository: jinnzy/jinnzy.github.io # Pages 远程仓库
publish_dir: ./public
keep_files: false # remove existing files
publish_branch: main # deploying branch
commit_message: ${{ github.event.head_commit.message }}
|
上传hugo项目传到github
当前所在目录:./jinzhy.github.io.source
1
2
3
4
5
6
| $ git init
$ git commit -m "first commit"
$ git branch -M main
$ git remote add origin https://github.com/jinnzy/jinzhy.github.io.source.git
$ git pull # 先把之前提交的的内容拉取下来
$ git push -u origin main
|
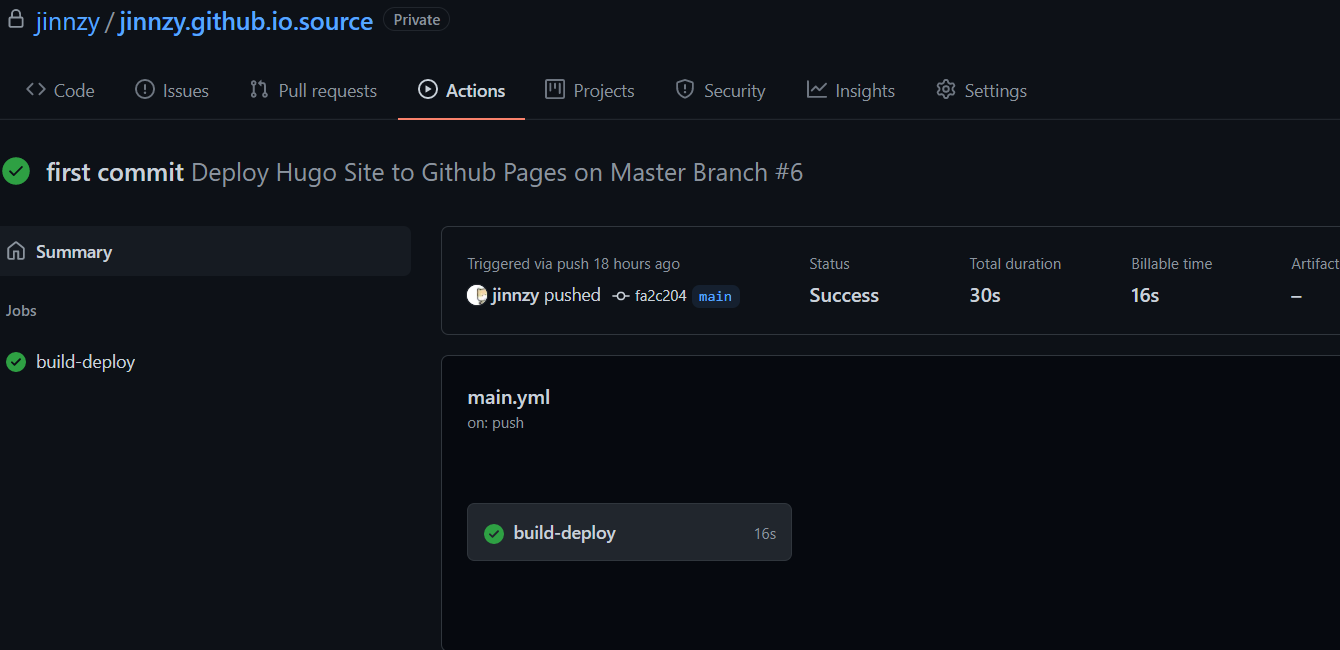
进入Actions 可以看到上传成功了

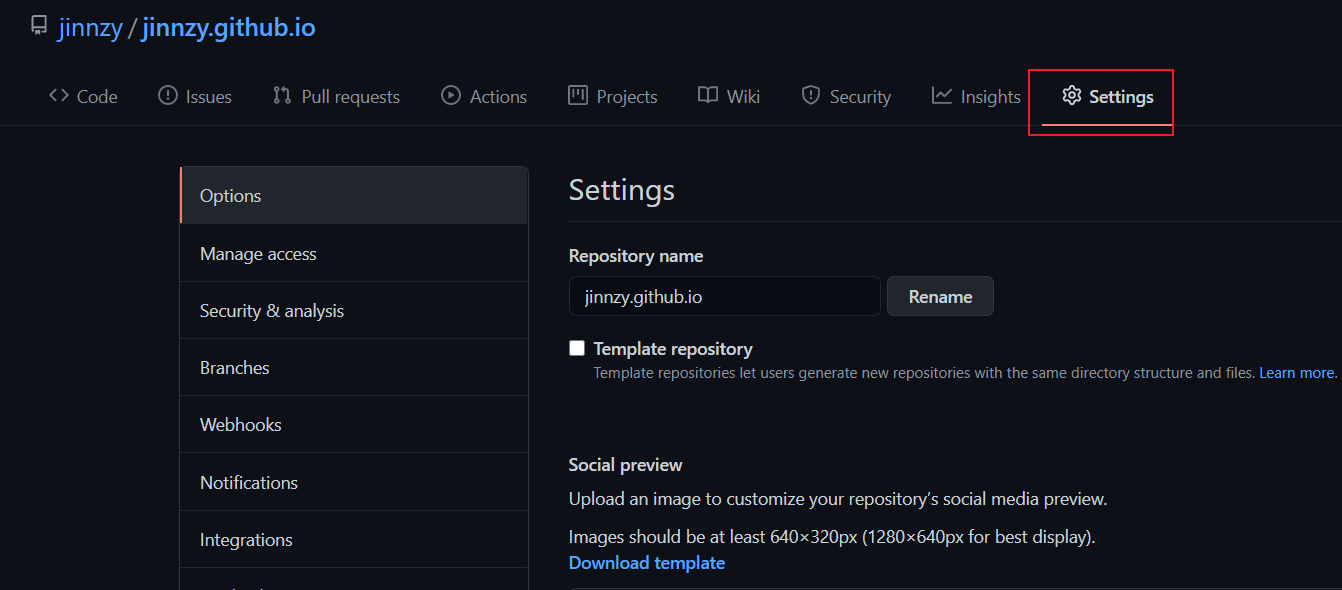
打开jinzhy.github.io 项目

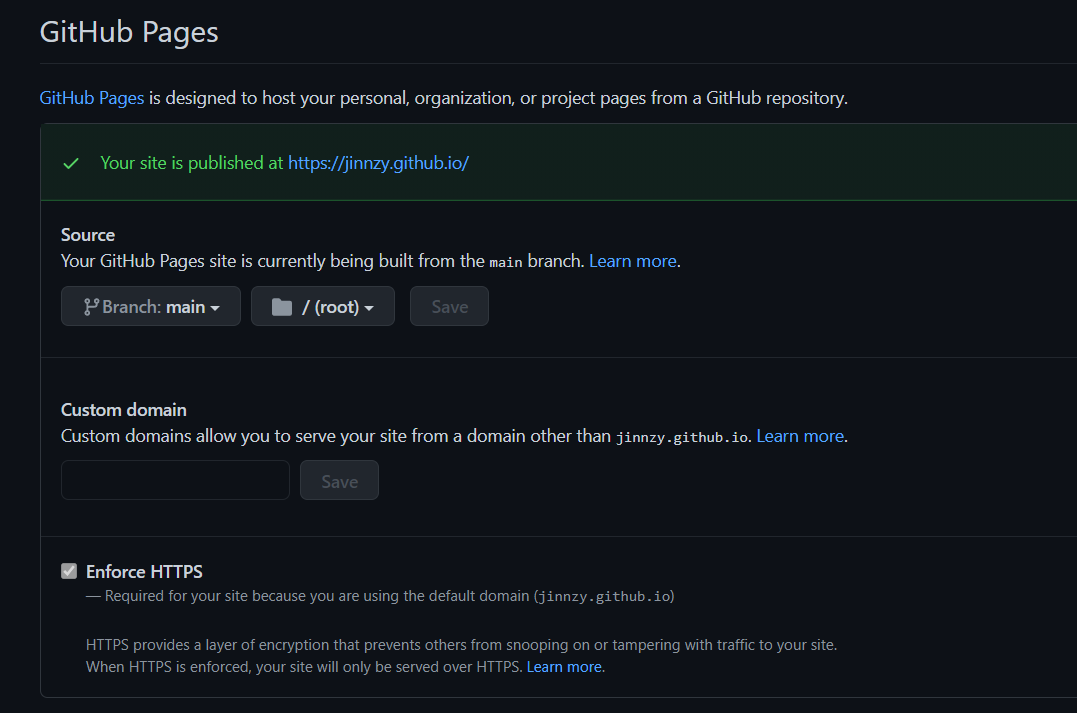
下拉找到GitHub Pages 可以看到发布地址,这时访问https://jinnzy.github.io 就可以看到博客了。

Console报错找不到/site.webmanifest
引用自lewky.cn博客中的内容。
该文件和Progressive web applications (PWA)有关,通过添加PWA到Hugo站点,可以实现离线访问的功能,也就是说断网状态下依然可以访问到你之前访问过的网页,换言之就是通过PWA来将访问过的网页资源缓存到了本地,所以断网下仍然可以继续访问网站。当然,恢复网络时会自动更新最新的页面资源。
但是目前该功能还不够完善,可能存在着安全性的问题,并且实现过程也比较繁杂,最终还是决定把这个引用给去掉,做法如下:
- 把博客主题目录下的
\themes\LoveIt\layouts\partials\head\link.html拷贝到根目录下的\layouts\partials\head\link.html - 打开拷贝后的
link.html,把<link rel="manifest" href="/site.webmanifest">删掉或者注释掉:
1
| {{- /* <link rel="manifest" href="/site.webmanifest"> */ -}}
|
添加友链
注意:参考了Reference中的几篇文章添加友链,发现css样式总是不生效,查了一下午才在这个pr中发现loveit 主题某些功能需要把scss 转换为css 所以要选择扩展版下载,所以又重新下载了hugo_extended_0.80.0_Windows-64bit 这个版本😭。
主要使用kkkgo/hugo-friendlinks项目中的代码。
添加友链样式
位置:jinnzh.github.io.source/assets/css/_custom.scss
 1
 2
 3
 4
 5
 6
 7
 8
 9
10
11
12
13
14
15
16
17
18
19
20
21
22
23
24
25
26
27
28
29
30
31
32
33
34
35
36
37
38
39
40
41
42
43
44
45
46
47
48
49
50
51
52
53
54
55
56
57
58
59
60
61
62
63
64
65
66
67
68
69
70
71
72
73
74
75
76
77
78
79
| // friendslink
.myfriends {
text-align: center;
background-color: #fff;
opacity: 0.9;
}
.myfriends a {
color: black;
}
.myfriends p {
display: none;
}
.friendurl {
text-decoration: none !important;
color: black;
}
.myfriend {
width: 56px !important;
height: 56px !important;
border-radius: 50%;
border: 1px solid #ddd;
padding: 2px;
box-shadow: 1px 1px 1px rgba(0,0,0, .15);
margin-top: -12px !important;
margin-left: 10px !important;
background-color: #fff;
}
.frienddiv {
position: relative;
left: 0; right: 0;
width: 100%;
height: 70px;
line-height: 1.38;
margin-top: -5px;
margin-bottom: -5px;
border-radius: 5px;
background: rgba(255, 255, 255, .2);
box-shadow: 4px 4px 2px 1px rgba(0, 0, 255, .2);
overflow: hidden;
}
.frienddiv:hover {
background: rgba(87, 142, 224, 0.15);
}
.frienddiv:hover .frienddivleft img {
transition: .9s!important;
-webkit-transition: .9s!important;
-moz-transition: .9s!important;
-o-transition: .9s!important;
-ms-transition: .9s!important;
transform: rotate(360deg)!important;
-webkit-transform: rotate(360deg)!important;
-moz-transform: rotate(360deg)!important;
-o-transform: rotate(360deg)!important;
-ms-transform: rotate(360deg)!important;
}
.frienddivleft {
width: 92px;
float: left;
}
.frienddivleft {
margin-top: 15px;
margin-right: 2px;
}
.frienddivright {
margin-top: 15px;
text-overflow: ellipsis;
overflow: hidden;
white-space: nowrap;
}
|
创建shortcodes友链文件
位置:jinnzh.github.io.source/layouts/shortcodes/friend.html
 1
 2
 3
 4
 5
 6
 7
 8
 9
10
11
12
13
| {{ if .IsNamedParams }}
<p><a target="_blank" href={{ .Get "url" }} title={{ .Get "name" }} class="friendurl">
<div class="frienddiv">
<div class="frienddivleft">
<img class="myfriend" src={{ .Get "logo" }} />
</div>
<div class="frienddivright">
{{ .Get "name" }}<br />{{ .Get "word" }}
</div>
</div>
</a>
</p>
{{ end }}
|
创建friend md文件
位置:jinnzh.github.io.source/content/friends.md
友链
1
2
3
4
5
| ---
hiddenFromSearch: true
---
# 友链
{{< friend name="Dillon" url="https://github.com/dillonzq/" logo="https://avatars0.githubusercontent.com/u/30786232?s=460&u=5fc878f67c869ce6628cf65121b8d73e1733f941&v=4" word="LoveIt主题作者" >}}
|
这里的friend 是引用上个步骤中创建的friend shortcodes
菜单中添加友链
位置:jinnzh.github.io.source/config.toml
1
2
3
4
5
6
7
8
9
| [menu]
[[menu.main]]
identifier = "friends"
pre = ""
post = ""
name = "友链"
url = "/friends/"
title = ""
weight = 4
|
最终效果

添加不蒜子,展示网站访问人数
这里的操作都在jinnzy.github.io.source 项目内操作
复制baseof.html 文件
1
2
| $ mkdir -p ./layouts/_default # 没有目录则创建
$ cp themes/LoveIt/layouts/_default/baseof.html layouts/_default/baseof.html
|
打开刚复制的layouts/_default/baseof.html ,添加<script async src="//busuanzi.ibruce.info/busuanzi/2.3/busuanzi.pure.mini.js"></script> ,引入不蒜子js文件
 1
 2
 3
 4
 5
 6
 7
 8
 9
10
11
12
13
14
15
16
17
18
19
| {{- partial "init.html" . -}}
<!DOCTYPE html>
<html lang="{{ .Site.LanguageCode }}">
<head>
<script async src="//busuanzi.ibruce.info/busuanzi/2.3/busuanzi.pure.mini.js"></script>
<meta charset="utf-8">
<meta name="viewport" content="width=device-width, initial-scale=1">
<meta name="robots" content="noodp" />
<meta http-equiv="X-UA-Compatible" content="IE=edge, chrome=1">
<title>
{{- block "title" . }}{{ .Site.Title }}{{ end -}}
</title>
{{- partial "head/meta.html" . -}}
{{- partial "head/link.html" . -}}
{{- partial "head/seo.html" . -}}
</head>
...
|
打开config.toml ,修改以下配置
1
2
3
4
| [params.footer]
enable = true
# 自定义内容 (支持 HTML 格式)
custom = '<span id="busuanzi_container_site_pv">本站总访问量<span id="busuanzi_value_site_pv"></span>次</span> • <span id="busuanzi_container_site_uv">访客数<span id="busuanzi_value_site_uv"></span>人次</span>'
|
最终效果:

由于是本地测试,域名都是localhost所以显示这么大的量是正常的,发布后使用真实域名数量就会显示正常
使用valine作为评论系统
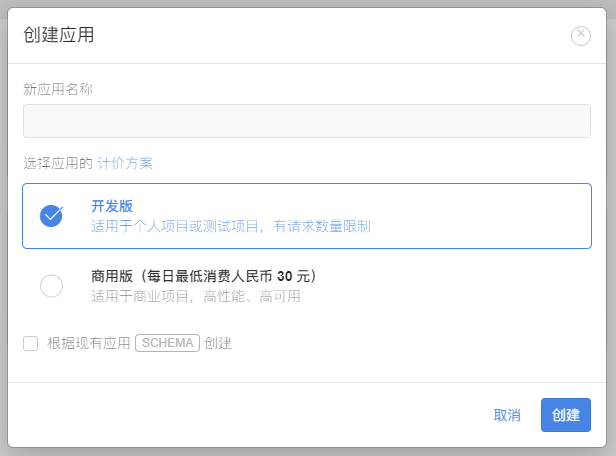
登录或注册leancloud,点击左上角创建应用。

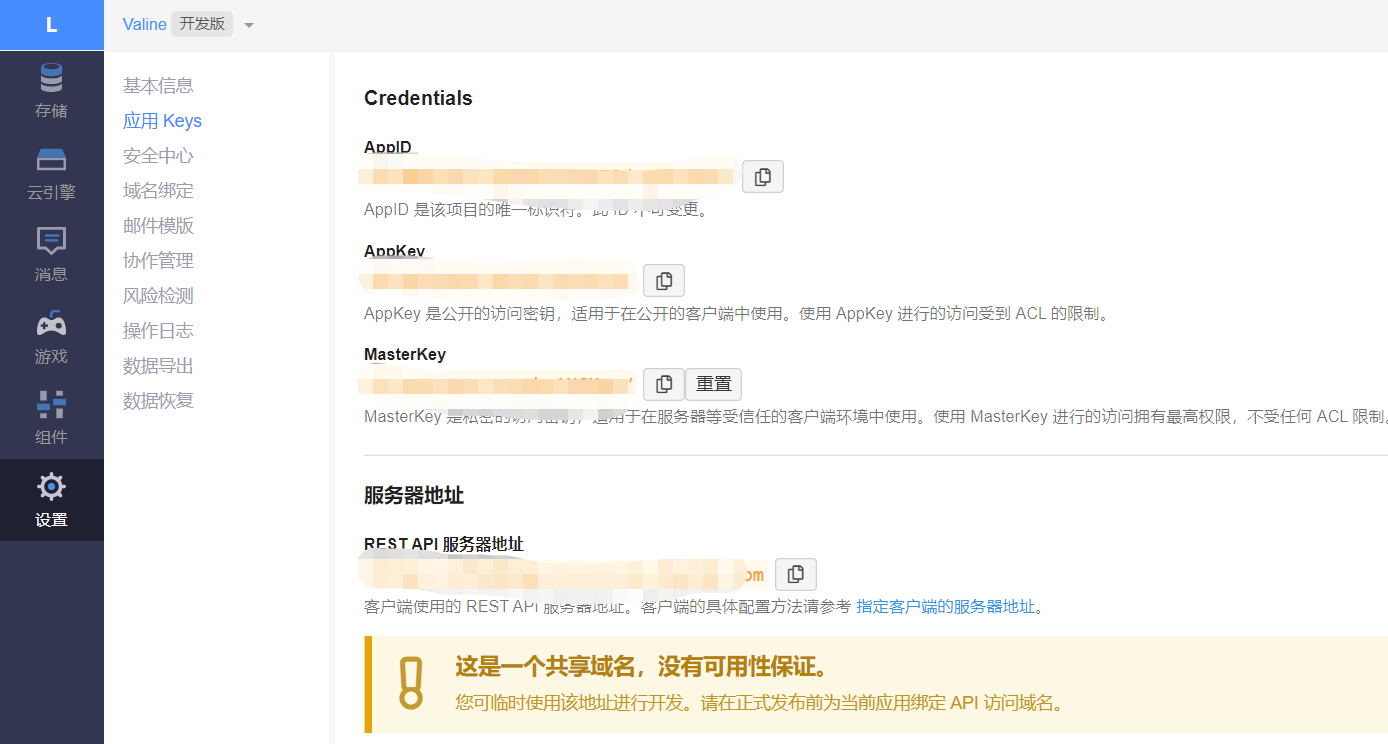
创建好之后,进入应用,选择设置 >应用Keys,获取AppID 和App Key 。

打开项目根目录下的config.toml,填入上个步骤获取的AppID 和App Key。
1
2
3
4
5
6
| [params.page.comment]
enable = true
[params.page.comment.valine]
enable = true
appId = "xxxxx"
appKey = "xxxxx"
|
运行项目进行测试,设置变量为production 环境,默认是dev 不显示评论等系统。
1
| $ hugo server --environment production
|
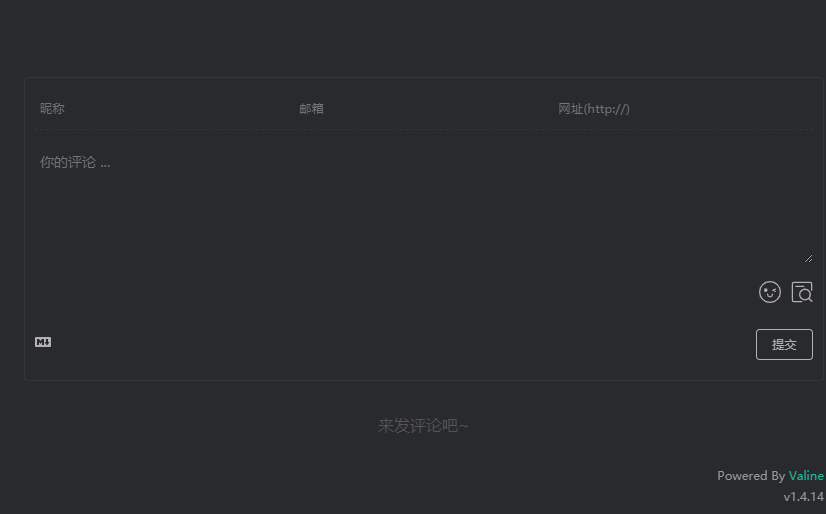
进入文章,看最底部已经有评论出现了。

使用自定义域名
参考资料
https://lewky.cn/tags/hugo/
https://hugoloveit.com/zh-cn/categories/
kkkgo/hugo-friendlinks友链
loveit自定义样式
不蒜子
https://valine.js.org/quickstart.html
推送百度站长
